Before you can take advantage of Xpunge's functionality
you will have to configure its preferences. You can do this either through the
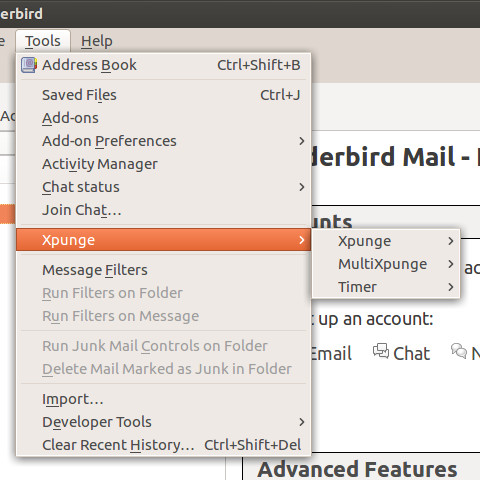
"Tools --> Add-on Preferences --> Xpunge" menu entry or through the hamburger menu
(the Thunderbird button with the 3 horizontal lines) by clicking the hamburger menu,
then "Add-ons" and then "Xpunge".
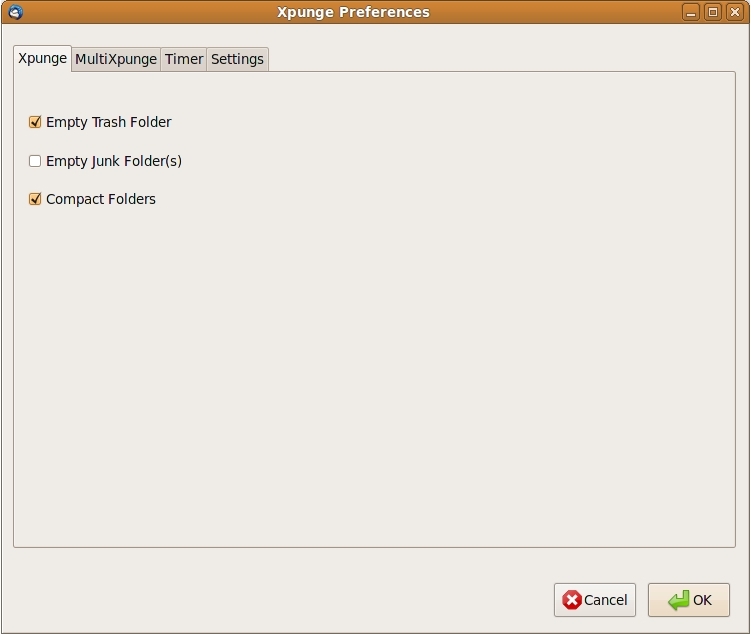
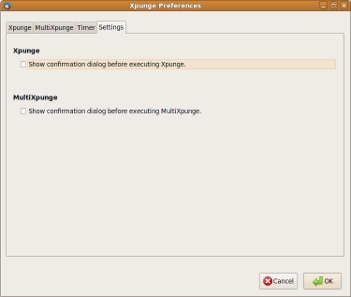
The "Xpunge Preferences" window contains four tabs, labelled "Xpunge", "MultiXpunge", "Timer"
and "Settings".
The "Xpunge" tab contains three checkboxes that control the "Empty Trash Folder", the "Empty Junk Folder(s)" and
the "Compact Folders" actions. The idea behind this extension ever since its conception
was to use all actions, however they have been made optional for more flexibility.
The checkboxes for Trash and Compacting are selected by default, whereas the checkbox for Junk is unselected (turned off) by default.

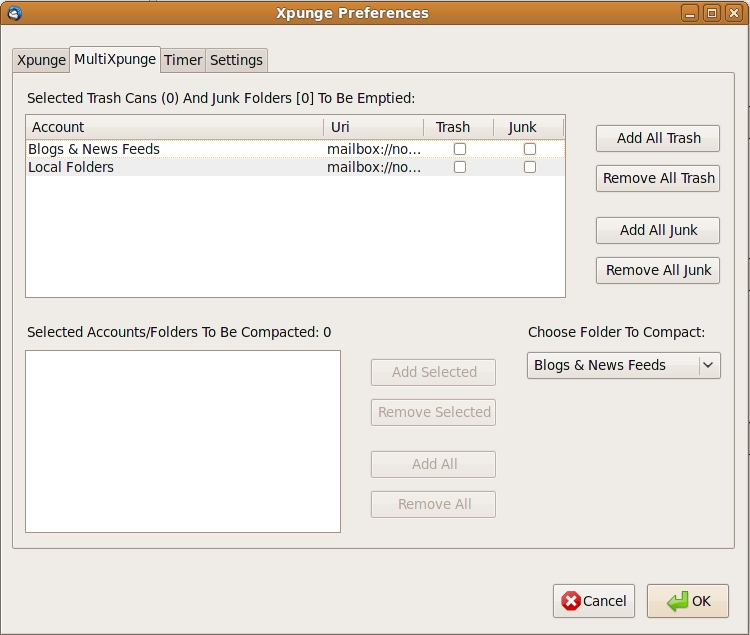
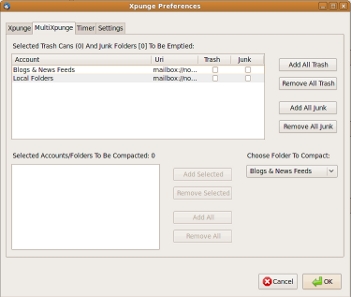
The "MultiXpunge" tab has two sections, one for selecting accounts that will have
their Trash Can and/or Junk folders emptied and another one for selecting accounts/folders that will be compacted.
There is a counter above each section that displays the total number of selected entries.
The tree for emptying Trash/Junk is always populated with all the accounts set up in Thunderbird and for each
account there are checkboxes to select which folders to empty.
The drop-down list on the bottom right side contains the complete folder tree
of all the accounts set up in Thunderbird and using the buttons you
can add and remove whole accounts or individual folders from the list on its left.
This list does not contain any entries by default so you will have to configure it
before compacting.
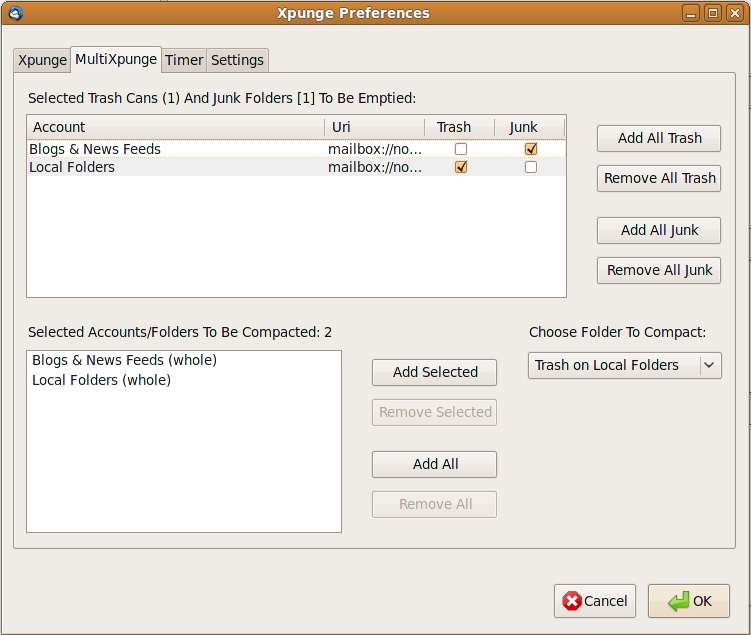
To select a folder to be emptied, just check the corresponding checkbox.
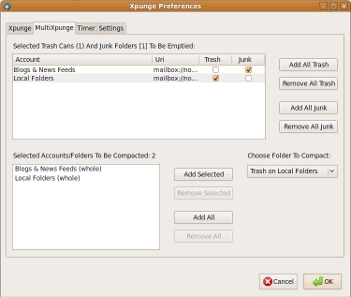
To add an account/folder to the compacting list, select it from the drop-down list to the right and click the
"Add Selected" button.
Note that when the "MultiXpunge" tab is opened, the drop-down list already displays the
name of an account. However, the account is not considered selected (so the "Add Selected" button is disabled).
You will have to expand the drop-down list and select an account/folder (either the one displayed or a different
one) for the "Add Selected" button to become enabled.
When an account is selected for compacting, " (whole)" is inserted
after its name in the list,
whereas a folder is followed by " on " and the name of the account it belongs to. The
"Add Selected" button
does not do any checking, so nothing prevents the user from selecting a whole account and also
selecting individual folders from that account. No checks are done during compacting either, so
in the case just described the selected folders would be compacted twice. It is up to the user to
avoid this simple redundancy.
Of course, you are not allowed to add the same account (or folder) more than once.
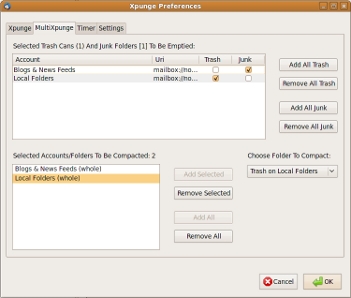
To stop a folder from being emptied, just uncheck the corresponding checkbox.
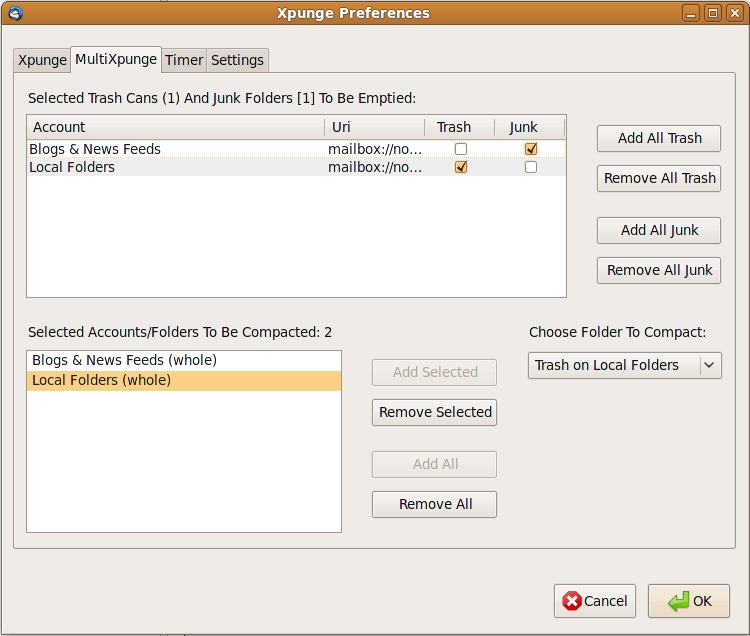
To remove an account/folder from compacting, select the corresponding row from the list on the left side
and click the "Remove Selected" button. The list does not allow selecting multiple
entries.
For the emptying functionality, there are buttons labelled "Add All Trash", "Add All Junk", "Remove All Trash" and "Remove All Junk"
that allow you to check or uncheck all the corresponding checkboxes at once.
For compacting, there are buttons labelled "Add All" and "Remove All" that allow the user to add or remove all the accounts from the
list. When the user clicks on the "Add All" button, all the existing entries of the list on the left
are first deleted and all the available entries from the list on the right are then added. The entries added to the
"Accounts/Folders To Be Compacted" list consist of a single entry for each available account (currently denoted as "whole")
rather than a separate entry for each sub-folder of an account.
The buttons for the emptying functionality are always enabled, whereas the ones for compacting become enabled/disabled according to where the user clicks on the window.
Clicking on the "Selected Folders/Accounts To Be Compacted" text, enables the "Remove All"
button. The same button is enabled if the user clicks inside the box of the list itself. If an entry
of the list is also selected (highlighted), the corresponding "Remove Selected" button should also become enabled. Note that clicking on the "Remove All" button
will delete all the entries of list, even if no account/folder has been selected (since the functionality refers to "All"
entries). Similarly, clicking on the "Choose Folder To Compact" text, enables the "Add All" button. The same
button is enabled if the user clicks on the drop-down list itself. The "Add Selected" button should become enabled only when the user selects
a specific entry from the "Choose Folder To Compact" drop-down list. To disable all the buttons for compacting, just click somewhere in the
empty area below the "Choose Folder To Compact" drop-down list.
All entries in the list for compacting display tooltips when the mouse pointer is placed over them,
while the tree for emptying Trash/Junk contains a corresponding column named "Uri".
In the (highly unlikely but "you know better") event that you have two accounts with
the same name set up on Thunderbird, you can use the tooltips or the uri column to distinguish them. This is the only case when
multiple entries with the same name should exist in the lists.
If you delete an account that has been added to the compacting list, the account will
probably still be present in the list next time you open the Preferences window (although the account
should not be processed if you use the "MultiXpunge" button). However, the deleted account should not be
present in the list after you restart Thunderbird.
All accounts/folders are processed in the order they have been added to the respective list.
The extension is supposed to skip IMAP accounts if Thunderbird is in offline mode.
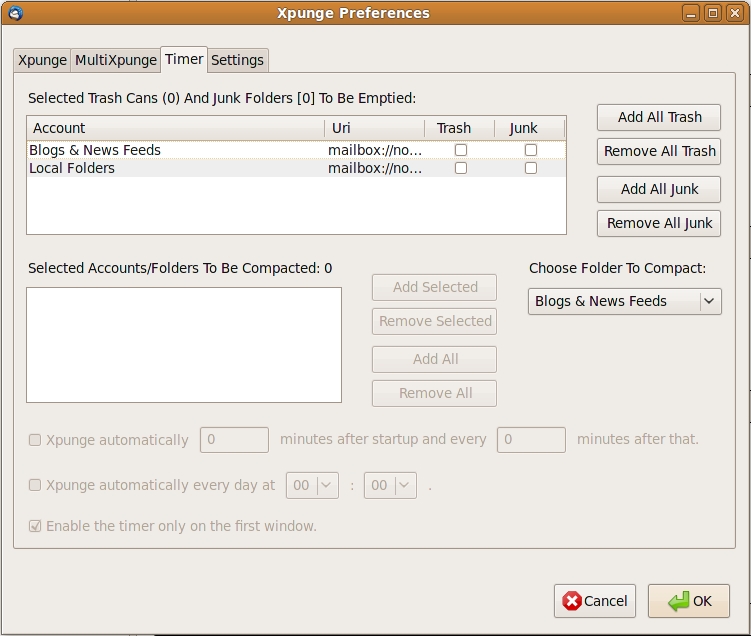
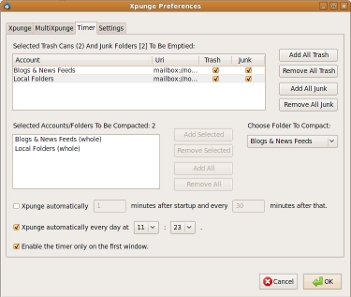
The "Timer" tab controls the timer feature, which is completely detached from the functionality
of the "MultiXpunge" button. This means that regardless of whether you are interested in the timer or not,
you can just continue using the "MultiXpunge" (and the "Xpunge") button as usual. The timer feature is
disabled by default.

The configuration is similar to that of the "MultiXpunge" tab, so you will first have to manually
add some accounts in order for the timer to actually do something. As mentioned above, the accounts
you add here are not connected in any way to the accounts you have configured the "MultiXpunge" button to process.
There are three extra elements in the "Timer" tab. One is a checkbox called "Enable the timer only
on the first window", which controls whether the timer will be enabled on multiple Thunderbird windows.
This applies to main Thunderbird windows (i.e. opened by right-clicking on a folder and selecting "Open"),
not the ones opened by right-clicking on a message and selecting "Open Message in
New Window",
which do not contain a timer anyway. If this checkbox is checked (and it is, by default),
only the first window will have a timer attached. In this
case, if multiple windows are open and the one that was opened first is closed, there is no way to enable
the timer on the rest of the windows for the current session. This is why users who like to have multiple
windows open are given the choice to control this. However, enabling the timer on multiple windows and
having it active through the preferences, means that there will be a separate timer running on each window
opened subsequently, something that will result in the same timer actions (emptying trash/junk and compacting folders)
being repeated redundantly.
The two other extra elements are the checkboxes that actually control the timer, since the timer is
activated/deactivated by them. They are unchecked by default and they actually remain disabled until
at least one account/folder has been added to one of the two lists on the left.
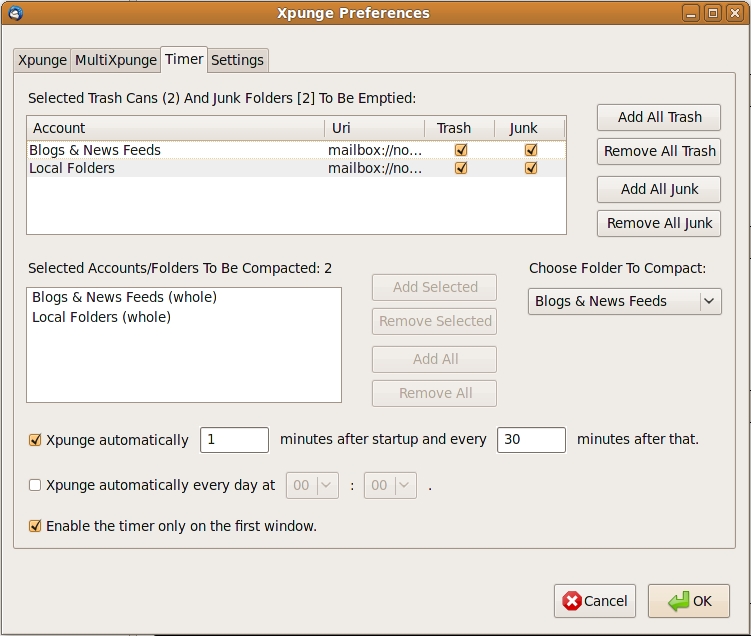
The "Xpunge automatically ... minutes after startup ..." checkbox will be referred to as the "relative" timer
and consists of two components, in the form of textboxes: an interval
for the first expunction and an interval for
subsequent expunctions, both defined in minutes. The intervals can be any integer from 0 to 99999 (which
should be more than enough). If both intervals are larger than zero, say 1 and 30, then an expunction will
occur 1 minute after the Thunderbird startup, and then an expunction will occur every 30 minutes after that,
so at 31, 61 minutes and so on after Thunderbird startup. The user can select to expunge only once per session,
by setting the second interval to 0 and the first interval to the desired number. If the first interval is 0
and the second one non-zero, say 30, then an expunction will occur every 30 minutes after Thunderbird startup,
so at 30, 60 minutes and so on. If both intervals are 0, no expunction will happen. Both textboxes will reset
their value to 0 whenever an invalid number is entered, but as mentioned above a value of 0 deactivates the timer,
so the smallest "functional" interval is 1 minute. Note that when compacting large accounts, 1 minute may not be enough
time for compacting to finish, so it is up to the user to define a reasonable interval for the timer.

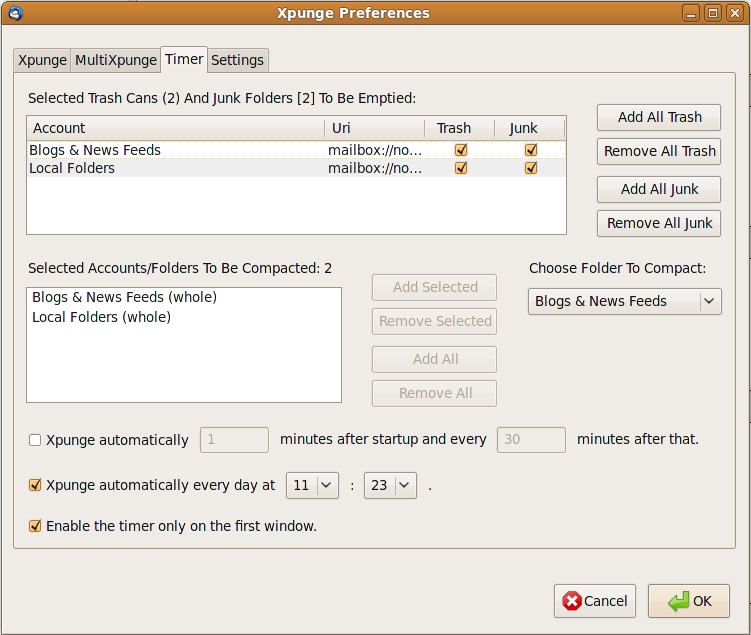
The "Xpunge automatically every day at ..." checkbox, also known as the "absolute" timer,
can be used to define a specific time of the day when expunction should occur.
The time is defined in 24-hour format using the corresponding drop-down lists, one for the hours and one for
the minutes. This timer feature is completely separate from the "relative" timer,
so they can both be set at the same time. No check is performed for times that coincide.
The "relative" timer has been implemented in such a way that only the second interval has a "positive" effect
on the current Thunderbird session. This means that changing the first interval through the preferences
will not have any effect on the current session, unless it is set to 0, in which case the first expunction
will not occur if it has not already done so. On the other hand, changing the second interval has both
a "negative" (when set to zero) and a "positive" (when set to a positive integer) effect on the current
session, and in the latter case the minutes start counting either right away or after the first
expunction (if it has not occurred yet). The "absolute" timer has been implemented in such a way that changing
the defined time takes immediate effect in the current Thunderbird session, so no restart is required.
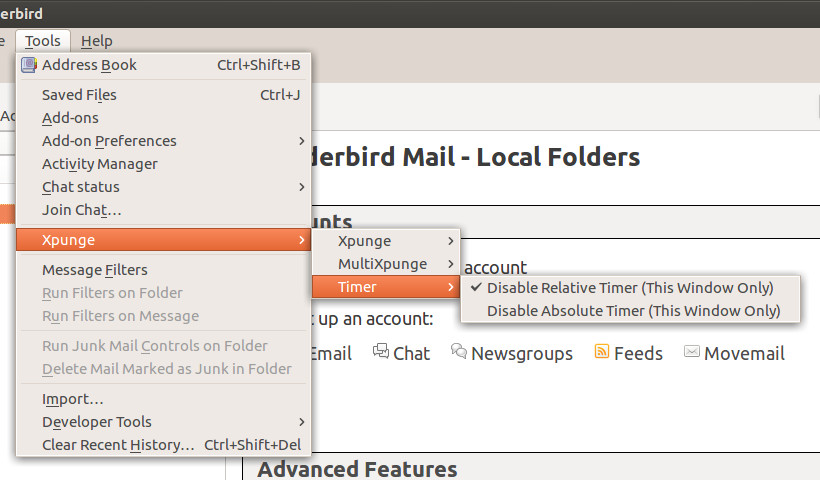
The timer can be disabled for the duration of the current session through the "Timer" sub-menu of the Xpunge menu.
So the "Disable Relative Timer (This Window Only)" menu item overrides
the "Xpunge automatically ... minutes after startup ..." checkbox
in the preferences window until Thunderbird is restarted.
Similarly, the "Disable Absolute Timer (This Window Only)"
menu item overrides the "Xpunge automatically every day at ..." checkbox
in the preferences window until Thunderbird is restarted.
Note that these menu items act only as "disable" options. When they are selected (checked) and the corresponding
checkbox in the "Timer" preferences is also checked, the
corresponding timer will be stopped. However, when they are deselected, the corresponding timer will not start
running unless the corresponding checkbox in the "Timer" preferences is checked.
Notice that the menu items control the timer of a single window only, whereas the preferences set up
in the Preferences window are shared among multiple Thunderbird windows.
There are a few facts about the behaviour of both the "relevant" and the "absolute" timer
that you should keep in mind. The "relative" timer (its second interval) does not start running at the time it is set up through the
preferences (i.e. when the preferences are saved by clicking on the "OK" button). It runs for the first
time after the specified interval has passed.
The same thing happens when the "Disable Relative Timer Relative Timer (This Window Only)" menu
item is deselected. If the checkbox in the preferences is checked, the timer will start running after
the specified interval. A similar thing also happens when Thunderbird is first started if the checkbox
in the "Timer" preferences is checked. The timer is set up immediately but does not run immediately.
Instead, there is a delay equal to the specified interval before it runs for the first time.
Also note that due to the way both timers are implemented, there might be a delay of (at most) one minute,
compared to the defined time, before expunction occurs.
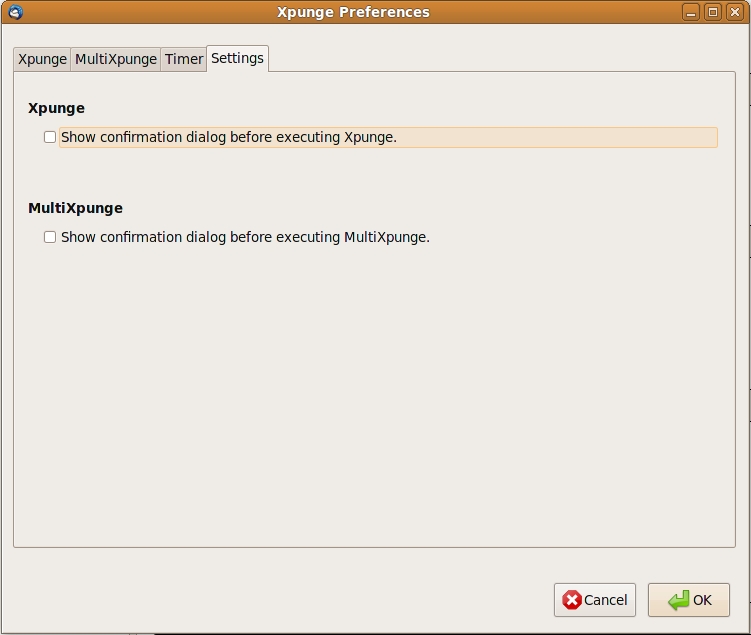
The "Settings" tab currently contains two sections, one for Xpunge and one for
MultiXpunge. The only option currently available is to enable a confirmation dialog when Xpunge or MultiXpunge is called. There is
no confirmation dialog option for the timer feature. The confirmations are a precautionary measure
in case the Xpunge buttons are pressed by mistake or the menu items are selected by mistake. Both options are disabled by default so that they do not
interfere with the setup of previous Xpunge releases, but any user who wishes to enable them can easily do so here.
NOTE:
Thunderbird has a default confirmation prompt popping up when trying to empty the Trash/Junk, with the message "Are you sure you want to permanently
delete all messages and subfolders in the Trash/Junk folder?". This prompt is completely unconnected to the Xpunge settings and can
be disabled/enabled independently.
|
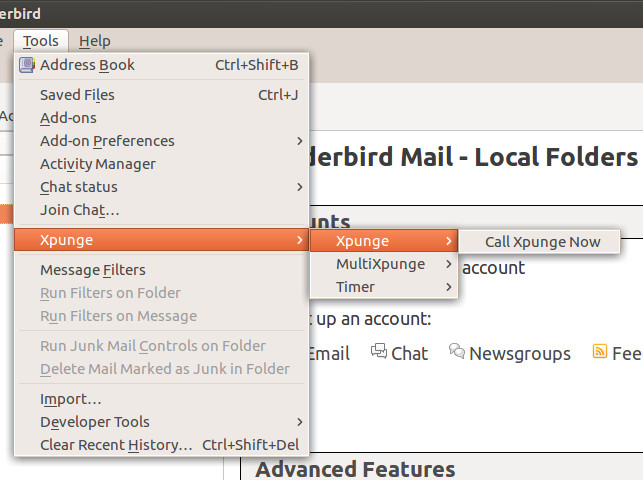
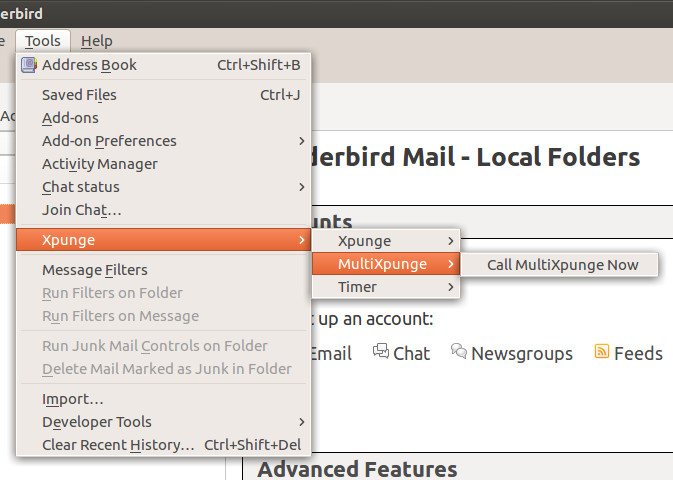
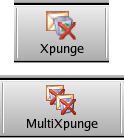 The extension makes available two buttons that can be added to the main Thunderbird toolbar,
one called "Xpunge" and another one called "MultiXpunge". Note that the buttons are not visible by default, you
will have to manually add them to the toolbar by following these instructions.
Each button offers the functionality corresponding to its name.
The extension makes available two buttons that can be added to the main Thunderbird toolbar,
one called "Xpunge" and another one called "MultiXpunge". Note that the buttons are not visible by default, you
will have to manually add them to the toolbar by following these instructions.
Each button offers the functionality corresponding to its name.